
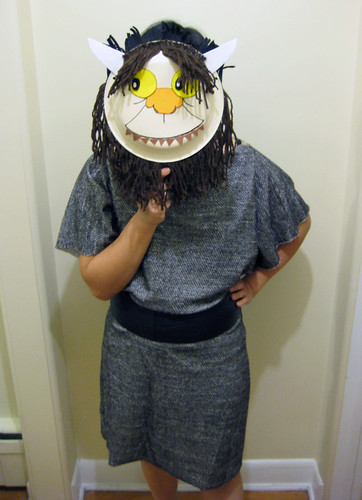
My son Sully's absolute favorite book is 'Where the Wild Things Are'. We have to read it everyday and he growls right along with Max & the gang of monsters, whenever the wild rumpus starts! So we decided to whip up a little wolf suit of his very own, and many thanks to his Nana for the gorgeous, one-of-a-kind masterpiece!!


WHERE THE WILD THINGS ARE MASK
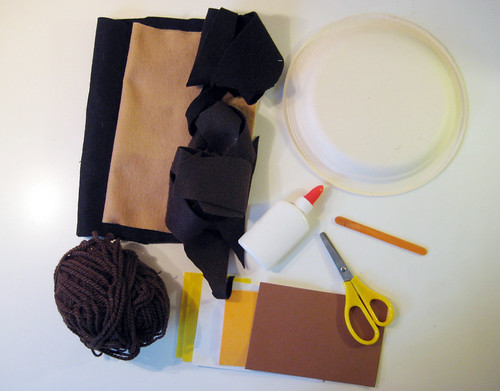
Supplies You Will Need:
~ Black felt
~ Brown yarn
~ Craft foam: white, yellow, orange, brown
~ Black permanent marker
~ Paper plate
~ Popsicle sticks/barbecue skewers/ or rulers to attach a handle
~ Craft glue or glue gun
Directions:
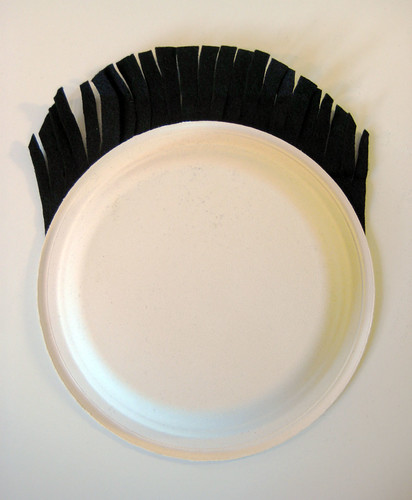
1.) Cut out a half-moon of black felt, slightly larger than the top of your plate. Glue to the back of the paper plate. Cut felt in strips to mimic hair.
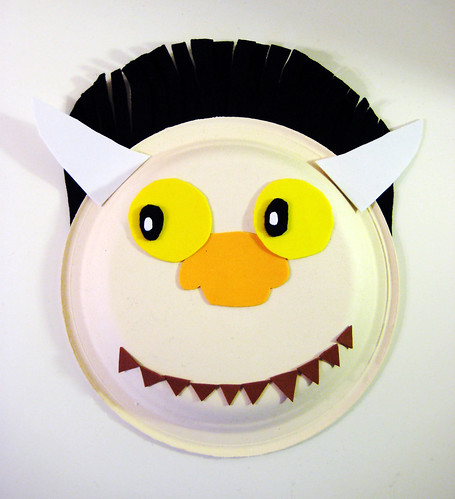
2.) Cut out two horns from white foam, two eyes from yellow foam, pupils from black felt and white foam, nose from orange foam, and triangle teeth from brown foam. Glue to top of paper plate for the face.
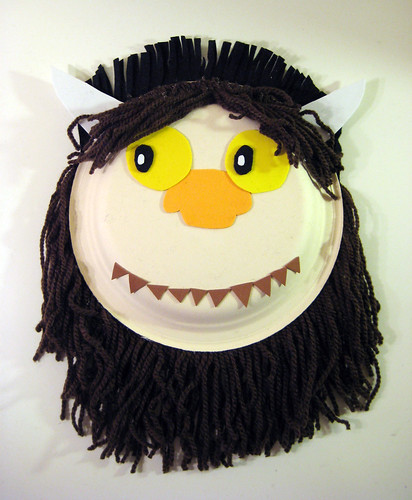
3.) Cut out strands of black/brown hair and glue to top of head and bottom of head. Use shorter pieces at the top and longer pieces at the bottom.
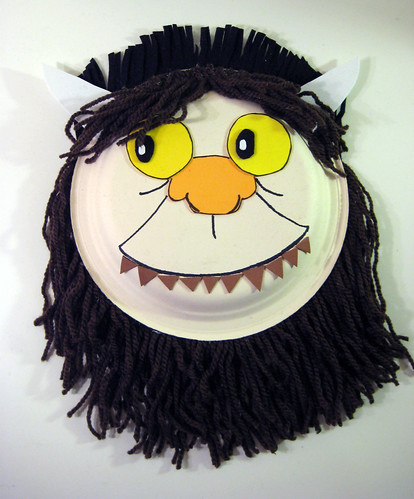
4. Using the permanent marker, outline the eyes, nose, and mouth, and lines under the eyes, the cheeks and nose (as shown in the photo).
5. Attach popsicle stick or skewers to the back of the plate using glue or tape.
And there you go, you’re a wild thing!
And although that was tons of fun, it is time to move on to Thanksgiving & Christmas! Stay tuned, because we have so many exciting DIY projects & lots of holiday inspiration heading your way in the weeks ahead!!!

No comments:
Post a Comment