If you are not redirected in five seconds, click here.

Friday, April 29, 2011

Neapolitan Dessert Delights . . .


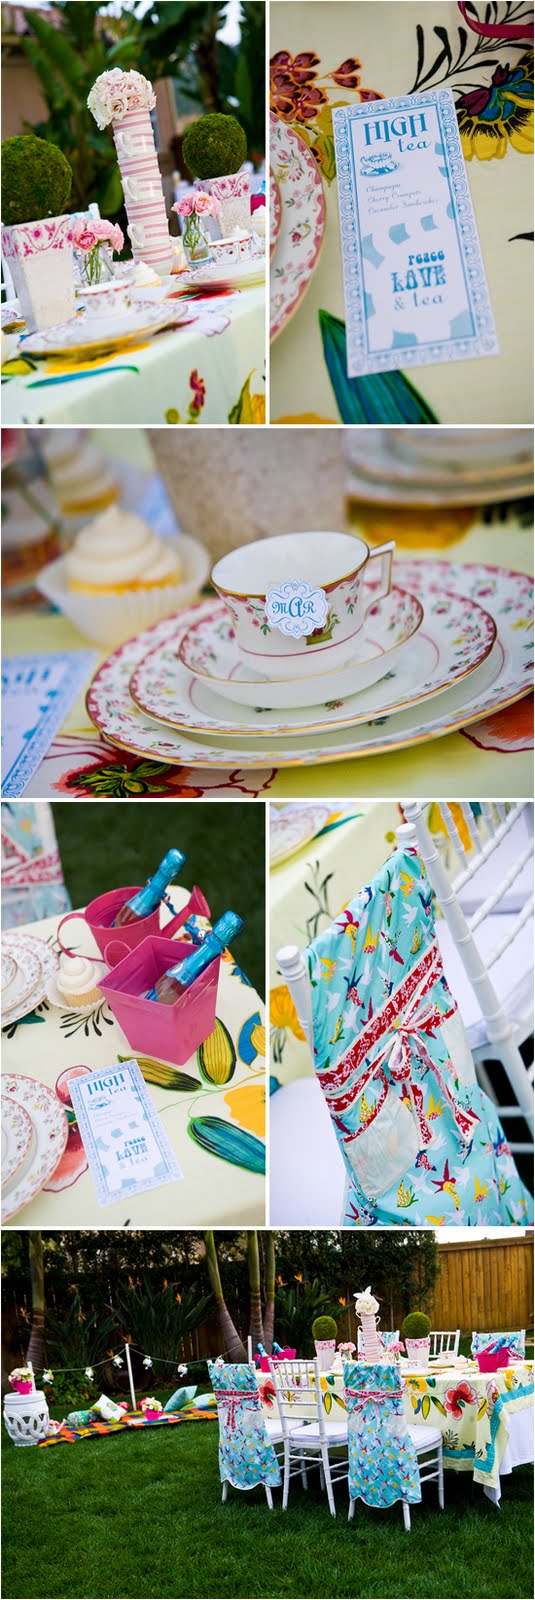
Well, since we have been inspired by all things Neapolitan in the past few weeks (remember Nicole's fabulous party over at Tradewind Tiaras?) and most importantly, since I have finally learned to spell the word, I thought a few delicious recipes might be the perfect way to take us into the weekend.  

Neapolitan ice cream was named in the late 19th century as a reflection of its presumed origins in the cuisine of the Italian city of Naples, and the many Neapolitan immigrants who brought their expertise in frozen desserts with them to the United States. Spumoni was introduced to the United States in the 1870s as Neapolitan-style ice cream. 

Early recipes used a variety of flavors; however the number of three molded together was a common denominator.  As chocolate, vanilla, & strawberry were the three favorite flavors over in the United States, this combination quickly became the standard...and judging from how yummy & pretty those three tasty flavors meld together, I am so very happy that it did . . . 


3 layers of rich Southern Devil’s Food Cake stacked between fluffy Neapolitan flavoured Swiss Meringue Buttercreams: Belgian Chocolate, Vanilla, and Strawberry, and topped with pure dark chocolate sprinkles from Holland. 


To find the recipe for this delicious inside-out Neapolitan dream, click here:  Sweetapolita

Or check out this fantastic Neapolitan Five Layer Birthday Cake with Strawberry Frosting . . .


Recipe for this lovely layer cake can be found here: Sweetapolita

And since we're on the subject...why not make some cupcakes too?


What you will need:


~ Vanilla Cake Mix
~ Chocolate Cake Mix
~ Simple Buttercream
~ Pink Food Coloring (I used Americolor Soft Gel Paste in Soft Pink)
~ Pastry Bag
~ Favorite Decorating Tip (I used a Large Plain Round Tip)


1.  Line your cupcake pan with your cupcake liners.  I used my favorite chocolate brown liners.
2.  In two seperate bowls, follow your individual vanilla and chocolate cake recipes to make the cake batter.
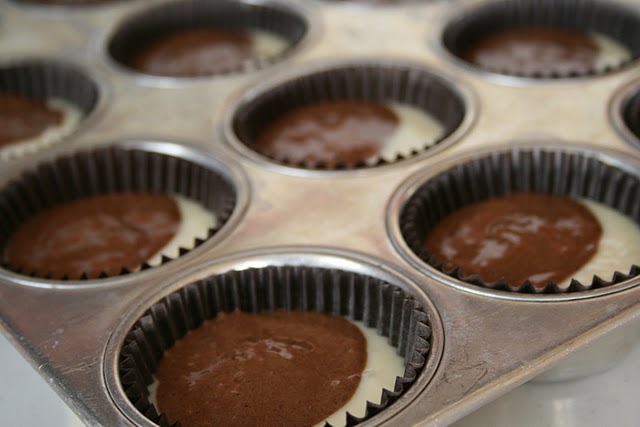
3.  First, fill your cupcake liners with 2 tablespoons of vanilla cake mix.  Next, add 2 tablespoons of chocolate cake mix on top of the vanilla.
4.  Bake cupcakes according to your own indiviual recipe.  I used a store bought cake mix, which called for 20 mintues at 350 degrees.  Remember to rotate your cupcakes half way through your baking time.
5. While your cupcakes are baking you can make your Simple Buttercream recipe.  We used 2 drops of the Americolor Soft Gel Paste in Soft Pink to get the pretty pink color.


Aren't they just fantastic?  Make sure to let your cupcakes cool completly before decorating.


Love the look of these gorgeous, fluffy cupcakes but not sure if you have what it takes to make it happen on your own?  No fear, here are a few simple steps to achieving that perfect cloud of frosting froth . . .

Piping Bag Basics:


Using a piping bag and decorating tip is super easy.
Directions:
1.  Place your decorating tip inside your piping bag.  If using a disposable bag, you will need to cut the tip of your bag.  Make sure not too cut to much, you don't want your tip to fall through.
2.  Fill your piping bag with frosting and twist the top of the bag.  This will create pressure so you will have an even flow of frosting.
3.  Place your cupcake on a flat surface.  Hold the top of your piping bag between your thumb and forefinger and the bottom of the bag with your other hand.
4. Start on the outside of your cupcake and in a clockwise motion pipe your frosting.
5.  If you're building your frosting upwards (as shown in the above photo) continue piping layers of frosting until a yummy frosting peak is created.

Cupcake tutorial courtesy of : tweedledesigns
Piping Bag Basics courtesy of: crazydomestic


Photobucket

Thursday, April 28, 2011

High Tea: Whimsical & Elegant . . .


Now that Spring is in full swing, what better way to delight in all of this warm weather than to sit outside with your friends & enjoy the fresh air.  This fanciful, bright, and playful tea party is sure to shake off any remaining wintery blues and fill your soul with sunshine . . .

What a wonderful way to add color & life to your backyard and to use up any spare, mismatched fabrics that you may have lying around.  Now brew up a fresh pot of herbal tea, chill up your mini bottles of crisp champagne, and get outside & have some fun!

Tea Party Courtesy of Project Wedding
Photobucket

Wednesday, April 27, 2011

Black, White, & Yellow: Vintage with a Fresh Twist...

So, we all know that black & white damask has been hanging around forever, and although I can still never seem to get quite enough of it, I just love the way a bright splash of yellow can really liven things up a bit!  Throw in a few lemon heads and some yellow gumballs and you add just the right amount of youth & playfulness to damask's vintage & refined sophistication.

Behold, a birthday party . . .


And a table setting to die for . . .


Sweet little seating cards . . .


And elegant, scalloped cupcake toppers . . .


Fresh, fun, & fancy too, don't you think?  Now, you know, there is only one thing missing from a party so dashing & debonair...invitations & favor labels, that's what!  Stay tuned tomorrow for the new line, arriving in our Etsy shop hot off the press!

Daisy Dessert Buffet & Photos Courtesy of Amy Atlas Events
Cupcake Toppers Courtesy of T and S Designs
60th Birthday Party Courtesy of Boutique Affairs
Photobucket

Tuesday, April 26, 2011

Tutorial Tuesday: Paper Flower Explosion . . .


I just adore the bright & festive way you can fancy up a party with paper flowers.  If you are willing to put in the extra time to make your party fabulous & unforgettable, and also want to create a floral masterpiece that you can use over & over again...then paper flowers may be just the project for you!

Difficulty Level:  Moderate

Supplies You Will Need:

~ Sheet of crepe paper (the sheets of crepe paper, not the streamers.  You can substitute this for tissue paper but it is a little more difficult to work with & less durable.  You can purchase all sorts of fantastic colors of crepe paper sheets here:  Crepe Paper Retailer
~ Small piece of cardstock
~ Scissors
~ Glue (I used Aleene's Tacky Glue)
~ Toothpick


Cut 12 circles from a sheet of crepe paper, any size you like depending on how big you want the final flower to be. I accordion-folded a strip of paper and cut multiple circles at once. No need to be too precise; freehand circles will do.


Orient each petal so the grain in the paper runs vertically. Apply a bit of glue at the bottom of the petal and pinch it to create small gathers. When the glue has dried, press both thumbs into the center of each petal and stretch the paper to curl the edges inward, forming a bowl shape. 


Cut out a small circle of cardstock (about the same size as the petals before you shaped them.) Glue five petals around the outside edge. Then stagger four petals inside that ring, followed by three petals in the middle.


To make a center for the flower, cut a small strip of crepe paper and fold it in half. Cut notches along one long edge of the doubled paper to make fringe. Roll the fringed paper around a toothpick and secure with glue. Finally, glue this piece into the center of the flower. 


Lovely, right?  Now let's just say you want to use those crepe paper streamers.  All you need in this case is a roll of crepe paper & glue.  


Here's what you do:

1.) Layer the crepe paper with two colors to add some depth. The length of crepe paper you need just depends on how big you want your flowers to be. After you have both colors of crepe paper cut and layered just accordion fold them.


Then take your crepe paper and start to wrap it around and start forming your flower. Put a dab of hot glue at the bottom every couple of inches, just to hold the flower in place.

You can start to pull the top back a little to open the flower up as you go. After you have completely wrapped the flower into shape, you can form it to be as open or closed as you want.


And then . . .


So simple and so pretty aren't they? And the color combinations are endless...as are the possibilities of how you can use them!  And just to name a few...

Merely tack them to the wall...


Or use them to embellish a simple cake...


Why not add them to your paper table runners or give your napkin rings a floral punch?


Staying on a budget but want a unique & gorgeous table centerpiece?  Just take a quick walk in the woods to gather some dried twigs and top them with a few of your fabulous little flowers...


Or create a stunning archway to say your vows under, frame a dessert table, or just greet your guests at the entrance of your party . . .


Ah what a few sheets of paper, a couple rolls of streamers, and a bit of glue can do . . .

Partial Tutorials Courtesy of:

How About Orange (the orange crepe paper sheet flowers) 
&
Icing Designs (pink crepe paper streamer flowers)

Photobucket

Monday, April 25, 2011

Wrapping Paper Table Runners: A Gorgeous Party on a Budget...

In love with vintage fabrics & patterns but having a hard time fitting expensive linen rental into your party budget?  Well, why not think outside the box a bit and consider different ways to create the look you want without spending a fortune. . . .


For just a few dollars a piece, you can find all sorts of fabulous patterned & rolled wrapping paper and even come up with some gorgeous embellishments that you can make on your own . . .


Plain brown kraft paper (just $1 a roll at the Dollar Tree) can be fancied up with a decorative scrolly stencil . . .


Or why not cut your beautiful pattern out and dress up a plain white tablecloth . . .


And just imagine what can happen if you take it outside . . .


Look how lovely the look is complemented with these gorgeous paper flowers...


And speaking of paper flowers, how stunning is this rustic & sublime embellished runner?


Gorgeous, modern, & unique without barely even touching your budget!  Now how can you possibly beat that?


Photobucket